my project book

diy
I'm a paper and pencil kinda girl. Always have been. Always will be.  (I really miss back to school notebook shopping with my kids!)
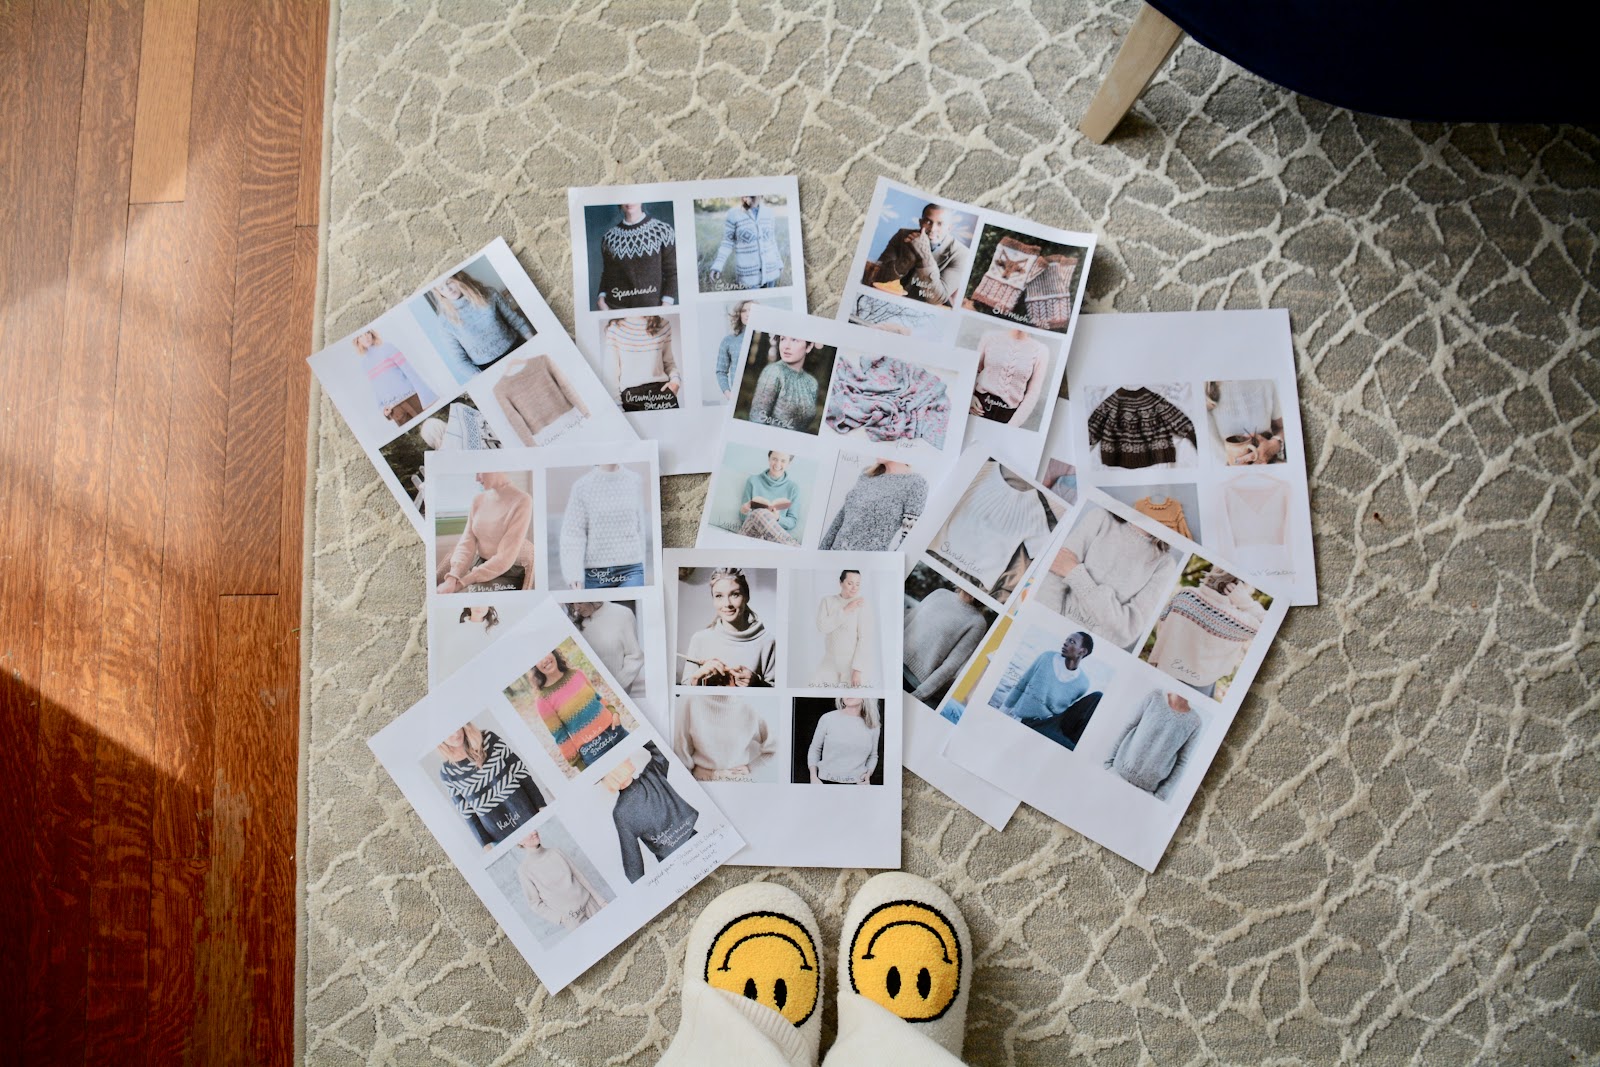
The first week after my wrist surgery may have been the roughest.  I missed my mom.  I missed my knitting.  And I missed the connection that knitting has to my mom.  I was all around just sad.  

I decided to get on line and find all sorts of inspiration for when I was able to knit again.  I scoured fashion websites and stores.  Looking for sweater inspiration everywhere.  And then I decided I needed to get on Ravelry and look for similar fashions that caught my attention.  Knowing that before I added anything to my Ravelry queue, I needed to start purging some patterns that I knew I would never make.  Boy did that feel good! (I have a habit of just adding things I like to my queue without actually using it for how it is intended.)
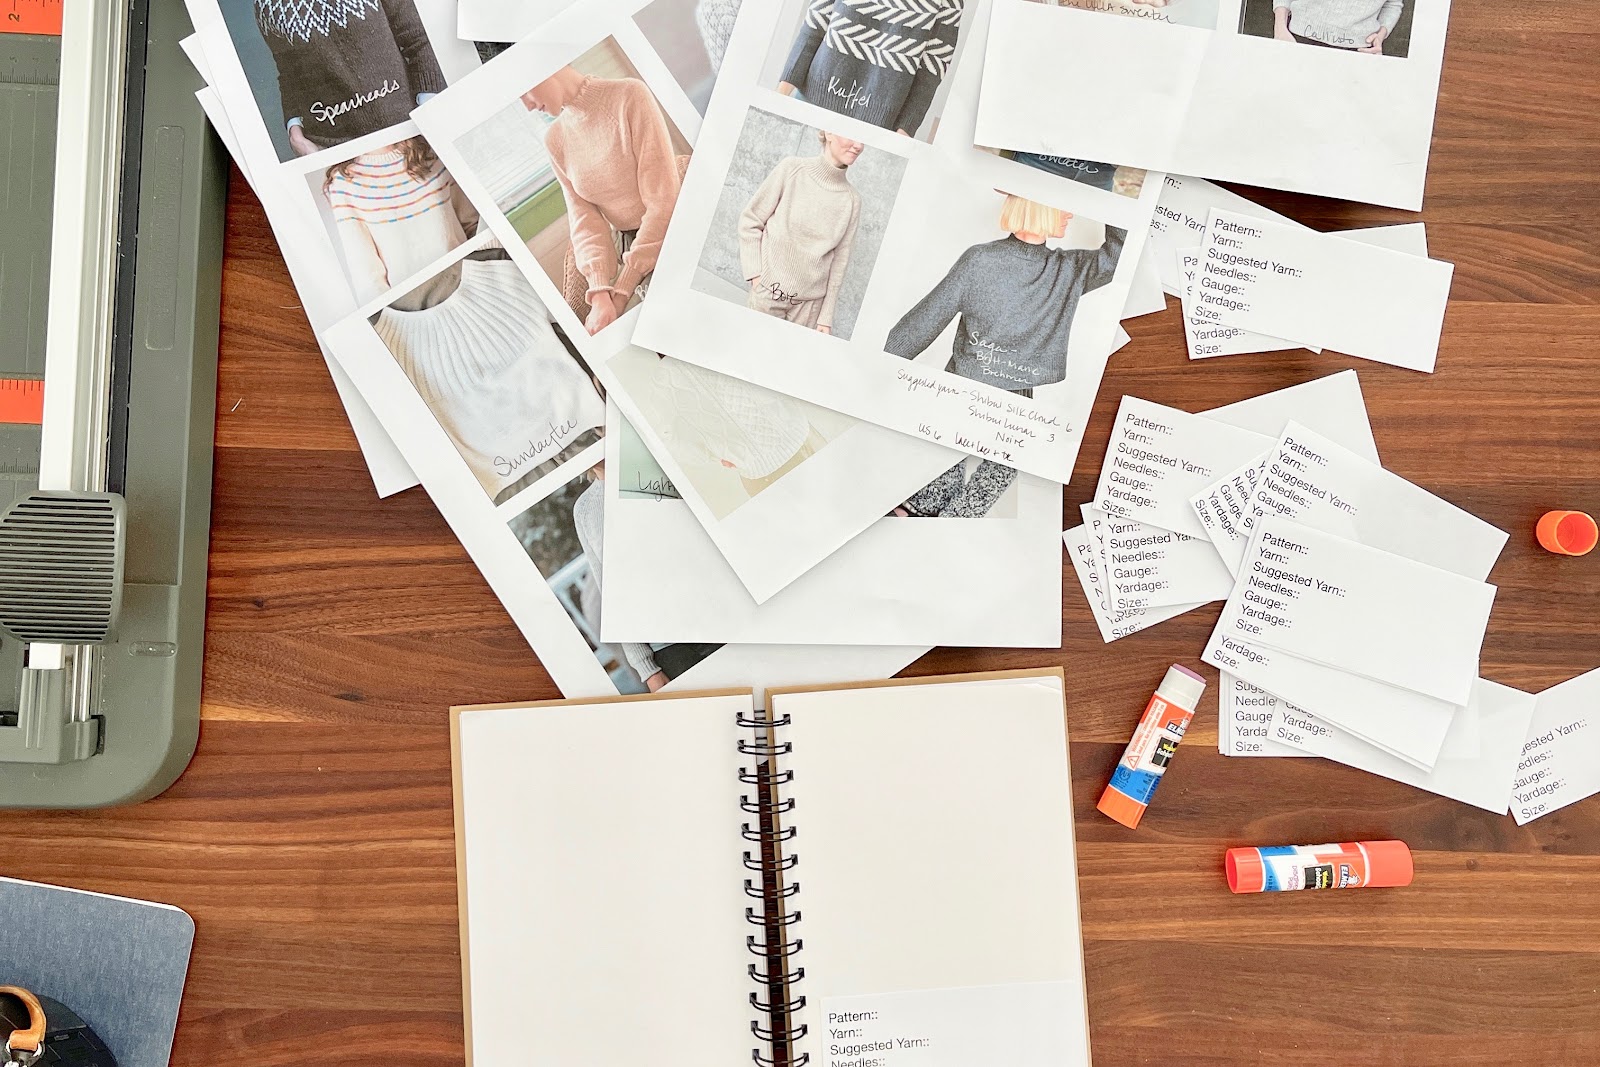
Then, I started taking screenshots, adding 4 to a page and printing them.  I then cut them using my handy dandy paper cutter and glued them into an old journal that was sitting in a pile of empty journals.

I started filling the pages with colorful photos and all of the project details.
Name, yarn weight, yarn suggestion, needle size, yardage and size. 

I have empty pages to fill as I see a pattern I would consider knitting.  
Tada.  All of my inspiration in one place.  When I need a new project, I know just where to look.  

So many projects, so little time.

Happy weekend friends!  

how to slip 3 along a garter edge

diy

Hi!  I put together a little video demonstrating how I slip the last 3 stitches on my Half+Half Triangles wrap.  This can be used on ANY of your garter stitch projects.  
 
The technique creates a much neater finish and I believe a more finished look.

I also demonstrate how I ALWAYS join a new ball of yarn.  If you just start knitting with a new ball then please go watch.  This technique will become your new favorite!

Enjoy!  

2021

diy

I absolutely adore the Karen Adams calendars.  I've used one for the past several years after receiving my first one from my friend, Kathleen.  The first one came as a set with the easel.  You then can purchase refills every year.  
The artwork on each month is just that... pure, beautiful art.  I think they are worth every penny.
However, this year,  I decided to save some of my pennies and make my own using none other than knitting for my inspiration.  
I used a template that I created years ago, but it's fairly simple to do on your own.  And printed them on white card stock.  
I then chose photos of some of my finished knits from 2020. We all have plenty of those!  It was fun to change it up for a year.  :)

feeling festive

diy
Hiya Friends! So... After my last post, I was thinking more about my Thanksgiving tablescape and exactly how that was going to look this year. We have a new dining room table and I want it to look extra festive this year.  I was inspired by a floral arrangement my mother received using a pumpkin as the vase.  
In my mind I thought, we have a perfect flat pumpkin and I do have a glue gun after all.  (Damn I missed that thing!)
I know, this pumpkin almost doesn't look real.  But it is!  I promise!  I bought a few succulents at HomeDepot and headed to Michaels for the few items I wanted to use to embellish it.  
 I literally glued the moss to the top, placed the living succulents around the stem, and then glued a few other earth toned dry items to the moss.  
I absolutely adore the feathers and thought they were the perfect finishing touch.

You can literally make this in about 20 minutes!  Get busy, friends!

acorns

I can't believe in less than two weeks it will be Thanksgiving Day!  It's so hard to believe.  
In case you need a fun knit to acorn, I mean, adorn your Thanksgiving Day table, I found one!

I was flipping through "50 knitted gifts" and stumbled upon this cute acorn pattern. (SO many cute patterns in this book!)  Like you, I have a lot of odds and ends in my stash so decided to whip a few acorns up.  We will have a table of 9 this year, so nine acorns it is!
If you don't have that book, I found a free pattern here and one on Ravelry for 50 cents here.  
I think they are simple and sweet.  

 Our Graham Cracker Chalkboard Placemats come out every year at this time.  I just love how warm our table feels when they are adorning it.  And they truly are fun for all ages!  If you would like to emulate this festive look, I'm offering my sweet friends 25% off the Graham Cracker Placemats.  Enter code THANKFUL at checkout.  


Better get knitting, friends!  

tie dye

diy
I decided we needed a few more masks around here.  I have a lot of fabric but thought I needed something new.  Instead of buying more (and more importantly going to the store) I decided to tie dye  an old white sheet.
Have you tried the ice tie dye technique?  My friend Nadine (Hi Nadine!!!) told me about it.  I couldn't remember exactly what she said but knew it involved ice and dye.  (HA!)
I ended up crumpling the dry fabric and placing ice cubes on top.  Then I sprinkled the Rit powder dye on top.  (Thanks Betsy!)  This all took place outside in the grass and in the sunshine.  The ice completely melted and the fabric dried.  There were a few places where the dye was still a bit powdery, so I wiped that off with my hand (while wearing a glove).
A quick rinse with the hose and then into the machine it went.
I think the results are super cool. (Thanks Nadine!) I'd actually like to make something else now out of this fabric.
Everything I have learned from mask making here.  And, the Fabric Patch has a new YouTube Video of everything new they have learned here.

Stay safe, friends!

makeshift darning needle

diy
 It was a glorious day in my Cabana.  The sun was high in the cloudless blue sky.  The sea was calm as I listened to the waves crashing gently against the shore.  The breeze was warm against my skin. I was spending the day alone, on the beach in Cancun, as my husband was in meetings all day. My first sock was almost finished and I was already dreaming about casting on for the second sock.   If I cast on today, I thought, I can probably finish by the end of the week.  This day could not be anymore perfect, I thought.  One last row, and I am ready to close the toe with the kitchener stitch.  I reach into my travel notion bag and hunt around for my darning needle.  Panic sets in.  What?  Where in the world is my darning needle?  I quickly dump everything out only to fully realize... there is no darning needle.  My dreams of finishing this pair of socks is shattered.
Wait, I think.  Come on, Leslie.  You can think of something to thread through these stitches to use as a darning needle.  Hmmmm.  No bobbie pin like I have used in the past.  No paperclips either.   I have my stitch markers but they are too wide.  I wonder if my Cabana neighbors have anything.  Would that be inappropriate (or weird) to bother the couples around me.  Hmmmmm.  
Well.  I do have washi tape.  And my double point needles.  If I tape the yarn to the needle, then I will be able to thread it through like a darning needle.
Voila!  Makeshift darning needle.
The day is once again perfect.
(Note to self ::  always carry washi tape.)

oils

diy
Just wanted to share a couple of things I have been putting on my skin.  
This exfoliating coconut scrub is so nice.  Exfoliating, moisturizing and refreshing.  It can be made with or without the lemon oil.  No essential oils?  Fresh lemon juice would be totally great, too.  And if you don't have lemons in the house... leave them out.  That would be great, too!
Coconut Scrub:
1/2 cup Coconut Oil
1 1/4 cup Sugar
10-15 drop Lemon Oil  (Lavender would be nice, too.)
I'm coming up on two years of using Young Living Essential Oils.  I still have SO much to learn.  But Ashley over on Story Oils is always there to help.  (She sells the oils, too!)
And speaking of Ashley, she posted a pic on Instagram of a cream she made.   I made it immediately.  I seriously put down my phone, grabbed my essential oils, the coconut oil, baking soda and started mixing.  It's amazing.  It really is the most gentlest exfoliator I have ever put on my face.  My skin is super sensitive and this did not make my skin react at all.  

For my body.             For my face.  

flower crowns

diy
Well, I had every intention to take photos of me wearing the Byron Bay Cardigan.  However, I had surgery on my foot on Wednesday and can't put weight on it for at least a week.  Knitting is taking place.  Lots and lots of knitting.  Just no modeling.
Instead I'm going to share our summer of '17 favorite craft.  ðŸ˜Š
I've always been the mom that loves to craft.  Summer vacations usually entailed something for the kids to make. Whether it was glueing shells on small votives, or painting rocks, or tying sticks or anything involving leather strands, or making bracelets or... you name it.  I wanted to make it.
This year, Libby had a friend in Tahoe. (My boys couldn't go... Charlie working an internship.  Andrew playing a lot of golf.)
Two nineteen year old girls?  Right up my alley.  Flower crowns it is!
I headed to the local florist.  Told her what I wanted to make and she helped me choose small, delicate flowers for the wreath.  A little florist tape to attach the flowers.
And, Voila!  We had ourselves our favorite snapchat filter!

the story of the tie-dye cake

diy
Libby and her girlfriends made a tie-dye cake when she was home and it turned out great.  It's not that it was that delicious, but it was really a lot of fun to look at.  The colors were super vibrant and beautiful.  I had it on my instagram story and received several comments on how to make one.  SO, I put together a little tie-dye cake story here. :)
I used a white cake mix and divided it into 6 cups.  Used food coloring to tint the batter.
Poured each color into a 6" cake pan.
Repeated 2 more times!
Layered and decorated.  (I think I should take a cake decorating class.)
The colors are not as vibrant and I am sure it is because I did not use as much food coloring.
I think I could have been neater when filling the cake pans to look less like a project my kids would have made when they were younger!
Anyhow, it was really a fun cake to make AND eat!  And in the end... it's really all about the frosting.

seven days of making, day 5

diy
Day 5 :: Cow Hide Coasters
This year, for Christmas, we decided one gift for one family member.  The only rule?  The gift had to be handmade.  So, the five of us threw our name into a hat.  I ended up choosing Steve's name and was so happy because I had been wanting to make these coasters ever since I saw them.  
They really are super easy.
I purchased the faux white leather here.  Traced the pattern.  Cut.  And colored with sharpies.  It truly could not have been easier!

seven days of making, day 3

diy
Christmas time truly is my favorite time to make homemade gifts.  My mother and sisters are usually the lucky recipients.  ðŸ˜œ 
While I was just in Florida, my sister pulled out all the things I have made her.  She seriously does like them!  
I was gifted some laminated fabric back in the fall.  Mostly sample sizes and odds and ends.  Since this fabric reminded me of my sister, Shelly,  I decided to make her something.  
 This little project was perfect.  Seriously the easiest sewing project, ever.  The YouTube video was extremely helpful.  To help me through, I truly played the video while constructing, paused the video, sewed, and then proceeded to the next step using the video.  SO easy!
A bright fabric inside should make my sister happy every time she looks inside.

seven days of making, day 2

diy
Day 2 :: Homemade Lip/Hand Balm
         { Chalk Lots Minis kept our balm's organized. } 
Not sure if I have ever mentioned what a fan I am of Young Living Essential Oils before... but I am!  I love my diffuser and have that thing going most of the time.  I use the oils on my skin and in my water.  There truly are 101 uses and benefits of Essential Oils; health and beauty!   I did some research before I dove in and found Young Living to be one of the purest oils produced.  I purchased my started kit from Ashley and have been loving them ever since.  If you have any questions about oils or are interested in buying them, please contact Ashley.  EssentialAshley at gmail dot com.  She will be your friend and your complete educator and she will constantly inspire you.  (Kits are 15% off until the end of December!)
Libby and I invited a couple of friends over, and had a lip balm party using our beloved oils.  We used these larger tins and these smaller containers.  (You can make tubes if you prefer!)   I love the larger tins and use this balm as a hand moisturizer.  Especially helpful for us knitters!  It truly feels incredible.  And, breathe in the scent... instant calm.

chalk cloths

diy

Okay, I have something fun for your Chalk Lots!  Chalk Cloths!  They add the handmade touch to the gift that makes life even sweeter!  And you can whip one up for your Chalk Lot recipient in no time!
And, I have a great idea!  One set of Chalk Lots can be divided up into four gifts.  (4/set) They really make a great hostess gift.  Or gift for a friend.  Or a neighbor.  Or teacher.  Or boss.  Throw in a chalk cloth and an easel and they have a menu/reminder/inspiration board!

 White for Graham Cracker.
Black for Licorice.  
The Chalk Cloth pattern is just a standard wash cloth pattern.  I like to use Sugar'n Cream yarn.  Super durable. 
Last day to order Chalk Lots for Christmas delivery is probably Thursday.  If there is a question, please feel free to shoot me an email.

a quick handmade gift

diy
Okay, this is one of my favorite things I have ever received.
My sister made these last year.  One of our little get togethers where she makes us cry, cause her "party favor" is the most thoughtful, loving, beautiful.  Always.
A set of personalized coasters.  With some of my favorite moments.  
And these days, it's so much easier to grab your friends photos with Facebook and Instagram.  Just take screen shots, resize to the coaster size (4x4) and print!  It couldn't be easier!
I found a tutorial here.
Honestly, grab your materials this week and have a crafty couple of hours over the weekend. Still in plenty of time for Christmas.  I think moms could give them to dads, parents, lovers, friends, kids.   And vice versa on all!
I think its just the perfect little gift.

rag jewelry

diy
Okay.  For all of those looking to make some rag jewelry, here you go.
First of all, I wanted to show you where this idea stemmed from.  This is a photo from TOAST.  A super cool catalog.  With super cool photography.  I, of course, fell in love with her bracelets.
And then, some girls at the pool where making them.  And one sweet girl gave me a whole bunch of bandannas and told us to cut what we want.
So, here is what I learned as we went along. 
First of all, bandannas probably work best.  Because the pattern is on both sides.  But I don't see any reason why a light weight fabric wouldn't work, also.
Cut your bandanna in a strip.  About 1 1/2 inches wide.  And put that rotary cutter down.  No perfect cuts here.  Just use scissors and make sure you cut it all "choppy". (It will fray better.)  Kids do a great job at this.  Just don't give them your sharp ginghers.
Then, get the strip wet.  I lied to my children and told them that they work best if you use a natural body of water.  A lake.  A river.  A creek.  An ocean.  A pool.  (Not natural? Really?)
Anything but the kitchen sink.  It just made it seem like a better summer project if you make it outside.  (I got this one wet in the kitchen sink.)
And then, twist.  It works really great if you put one end in your mouth.  And hold it with your teeth.  And then hold the other end, and start twisting.  Not too tight, or it will curl.  And not too loose, or it will lay too flat.
And then tie it on the body part of choice.  Wrist, ankle, or neck. I am sticking to my wrist, but Libby now has every spot covered.  DO NOT TIE TOO TIGHT.  They shrink a little when they dry.
Then, cut the excess fabric from the knot, and let the fraying begin!
I can't wait to see if this one will fray.  You know.  Since I used tap water.  :)
Enjoy!
(For the top photo, Libby wrapped one strip twice.)