how to slip 3 along a garter edge

diy

Hi!  I put together a little video demonstrating how I slip the last 3 stitches on my Half+Half Triangles wrap.  This can be used on ANY of your garter stitch projects.  
 
The technique creates a much neater finish and I believe a more finished look.

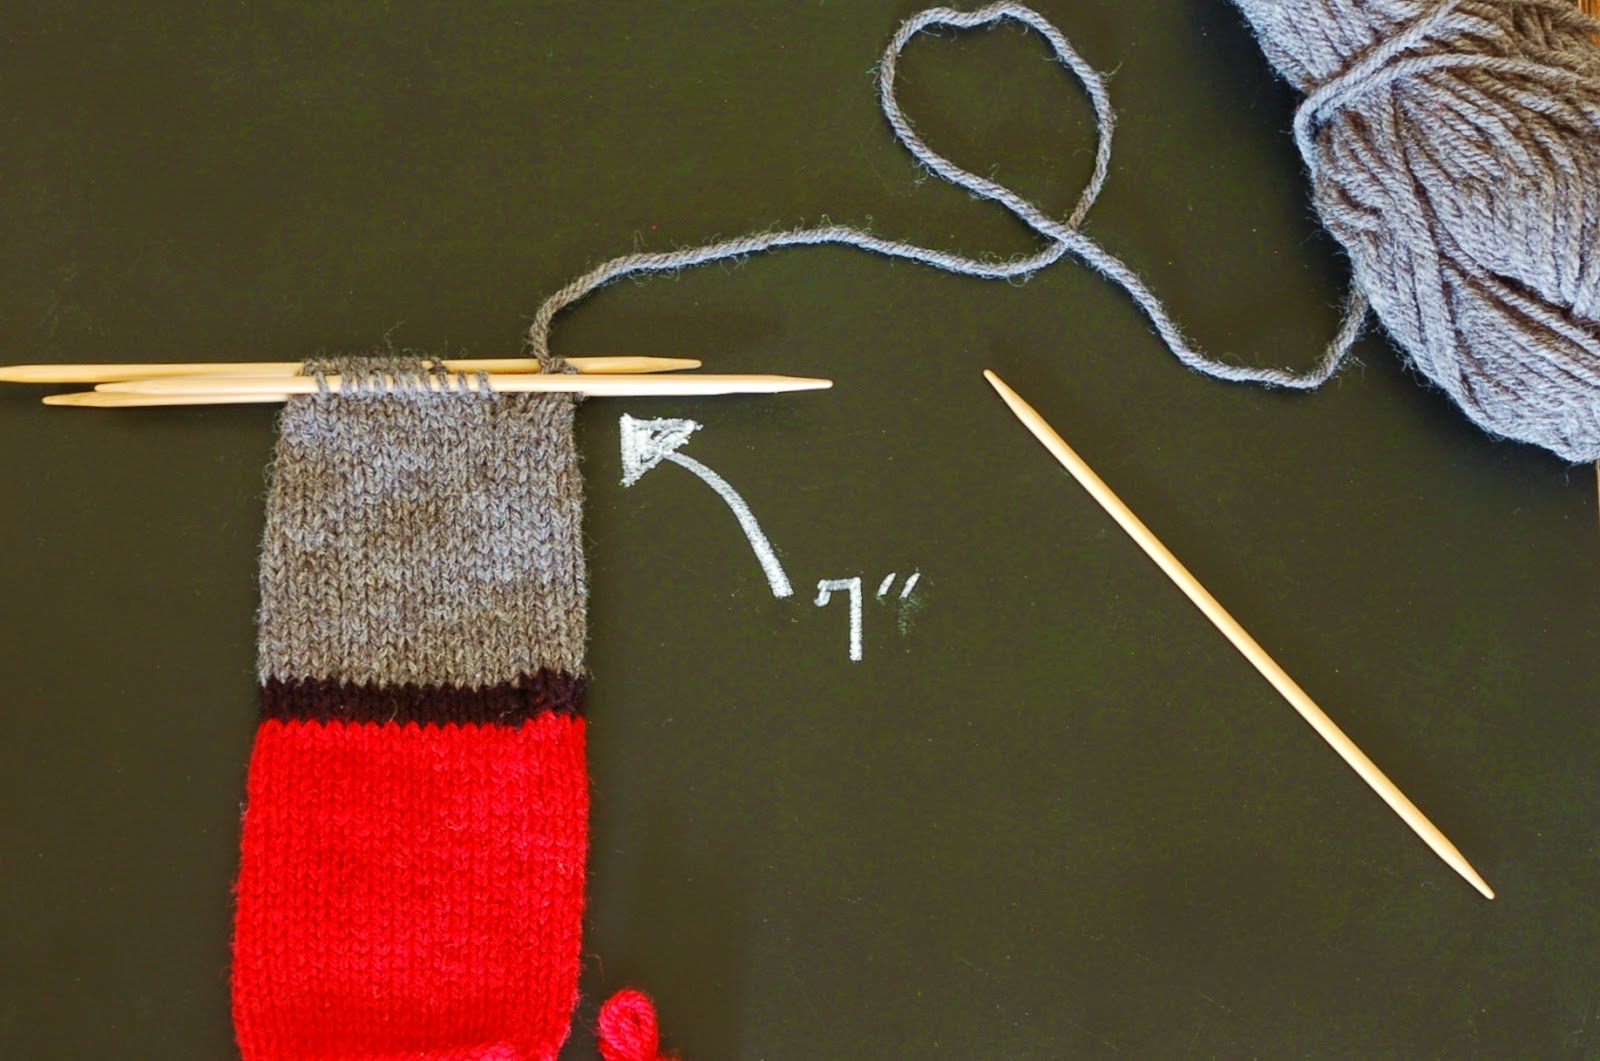
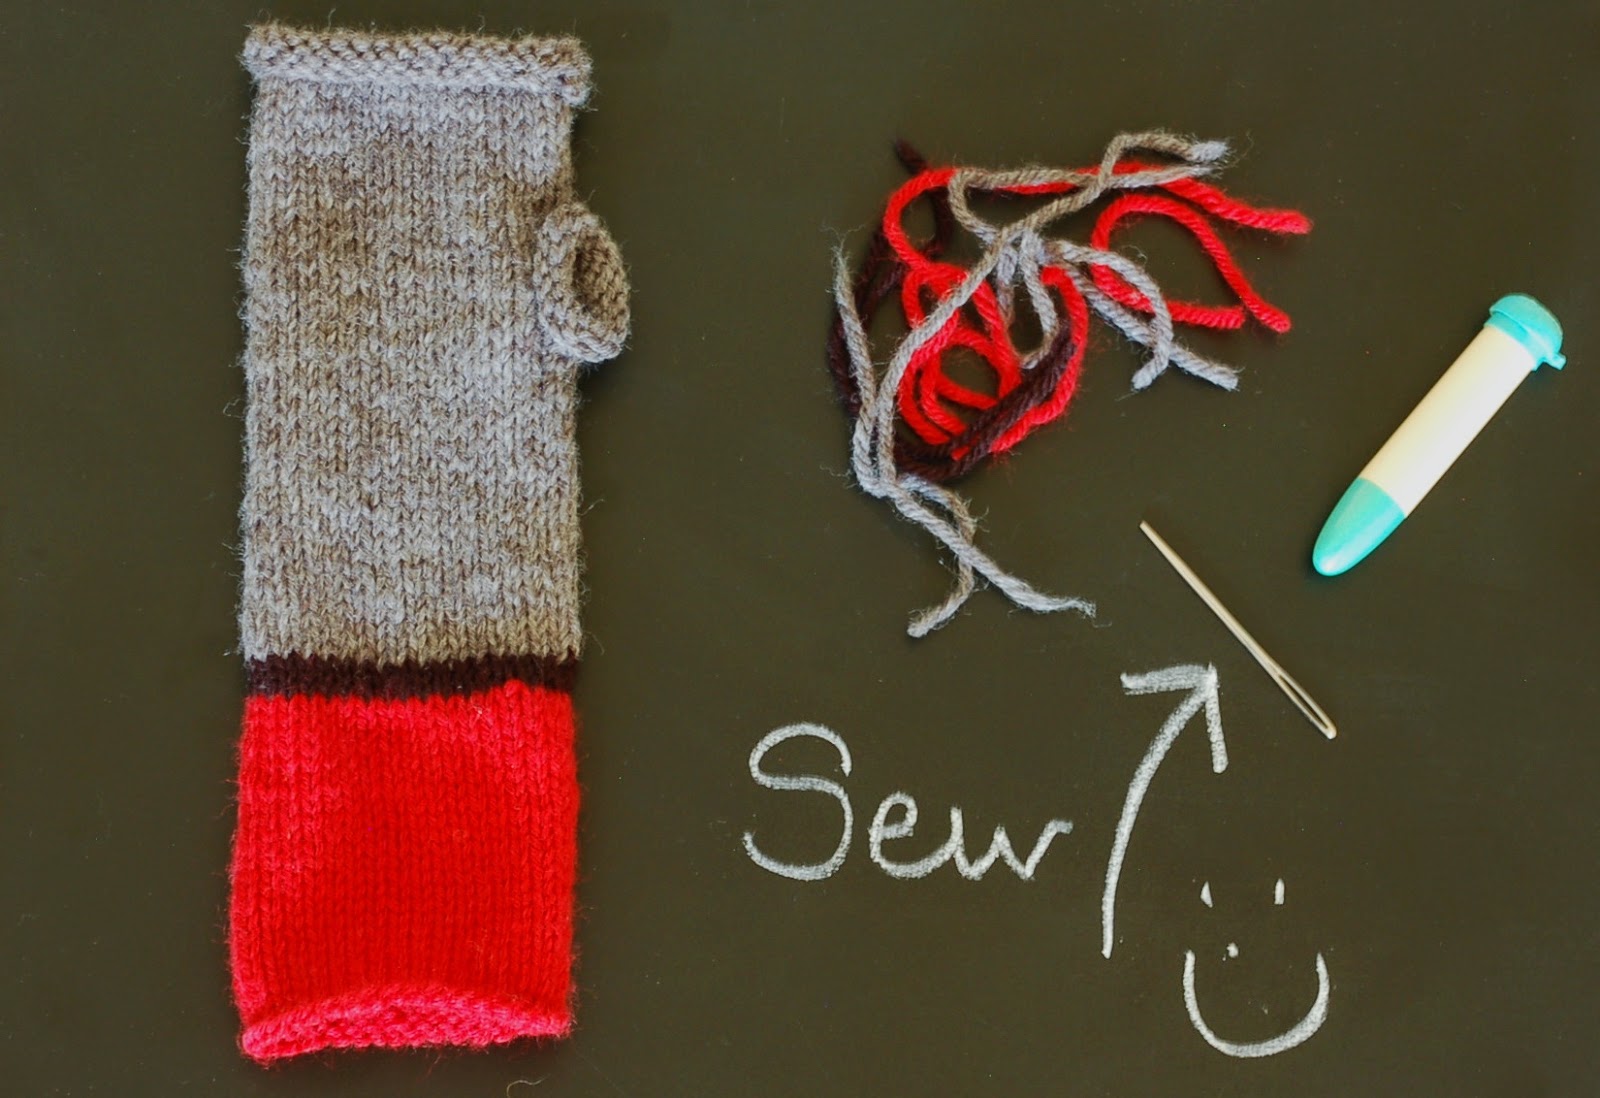
I also demonstrate how I ALWAYS join a new ball of yarn.  If you just start knitting with a new ball then please go watch.  This technique will become your new favorite!

Enjoy!  

making masks

So, chances are, if you sew, you are making masks. Or, you are thinking about making masks. I started to make a few over the weekend.  Right now I'm just making masks for my family and friends, but I will certainly make them for a facility if I hear of any.   I know they have strict guidelines for obvious reasons.
I think I have done the research and know exactly what it takes to be an ideal mask for this time.

I wanted to share where some of my favorite information came from and share some thoughts and tips from along the way.  I am SO grateful to all the people who have put together Youtube tutorials and shared their tips.  
First off.  What I learned from The Fabric Patch is that fabric alone will not prevent Covid-19 from entering into your nose/mouth.  Your mask needs to have some sort of non-woven layer involved.  Luckily I had non-woven interfacing in my fabric supplies.  You might, too.  I'm pretty sure it's hard to get your hands on it now.  The Fabric Patch videos give great substitutions for interfacing.  
I've seen some people make a mask that has a pocket where you can insert something (like a coffee liner) every time you wear it.  That just seems like another step I wouldn't want to have to do.  Because I didn't have much interfacing,  I purchased this from Staples.  I'll let you know if this is a good substitution after it arrives.  
I really like Mimi G Style video on Youtube.  She shares her printable template,  with step by step sewing instructions.  Her template is for an adult size.  However, f you are looking for other sizes, I saw this video which has template in 4 sizes.   

If you don't have elastic for the head piece, The Fabric Patch mentions a few alternatives.  I found it funny that one of the things she said to not use was yarn. ;)  You can, however, use shoelaces, grosgrain ribbon, bias tape or even make your own strips for tying.  

Mimi G Style does not mention a nose bridge in her video which I know is an important part of a secure fitting mask.  The Fabric Patch recommend a few things that you can use to build this part of the mask.  One she mentioned was an aluminum pan.  I was happy to have a few aluminum pans.  She shows you how to cut and fold and then sew through this tin at the bridge on the mask.   However, I was petrified to sew through it with my old girl.  I haven't had my machine serviced in like forever and thought this isn't probably the time.  (Obviously.)  So, I sewed along the edge of it and after a few (a lot) repetitive bends it ended up snapping in two. 

Then I tried this brass fastener.  I thought it was a brilliant idea from our contractor.  (On our kitchen job, more on that later.) However, I thought it a bit fussy maneuvering my way around that circle.

Jewelry wire has been my favorite so far.  I cut an 8" piece, folded it in half and then folded the ends in and covered with duct tape so there wasn't anything sharp inside.

I also tried a twisty tie.  Nice to sew around but she doesn't have that much strength.  I also saw where pipe cleaners work well.  Too bad I threw a bag away not too long ago.  Ugh.

It seems as if I haven't sewed anything in years, and was happy to use my friend to friend labels from name maker.  They always make things look a bit more finished.  

And here I am ready to go.  Just not sure when I will go.  I seriously have not left the house (only to walk the neighborhood) since March 16.

Stay home.  Stay healthy, friends.

bella cowl on youtube

Remember the Bella Cowl?  Well, I receive quite a few emails about this pattern.  It is a 4 stitch, 4 row repeat that seems to play tricks on our minds.  
SO, my sister Shelly and I put together a little tutorial while we were away last month.   We had so much fun giggling and trying to keep my mom and other sister, Lisa, quiet.  I really hope I never forget my sister saying, "Quiet on the set!  A Friend to knit with, bella cowl, Take 52." I still giggle thinking about it as I do watching this video.  
It took us about 300 attemepts and then it took days of waiting for Andrew to help me put it all together.

The pattern is under the header in the "simple knitting patterns" tab.  And this will be over on youtube if you ever need a little help.  (Or a good laugh.)

a different thumb for toasty

Have you ever been somewhere when your pattern calls for you to place live stitches on a holder and you don't have the correct materials to do so? Ya, me too.  And that is pretty much why I did this thumb and have grown to like it.  Not that I won't sometimes go back to the other thumb.  But, this one just works, too.  So, I thought I would show you in case you would like to give it a try.
And for my visual friends (Hi Barbara!) I thought I'd not only tell you, but show you.

The pattern is Toasty.  Remember there is Toast, too.  No thumb to even knit in Toast!
There is also always a link in my sidebar.
After 7" of working the pattern in the round, start working stockinette.  Purl a row, Knit a row.
Work for 9 rounds.  Thumb opening will measure 1.5 inches.
Join to work in the round again and knit until above thumb opening measures 2-2.5 inches.
Bind off.
Pick up 15 stitches around thumb opening.
Knit for 5 rounds.  Bind off.
Sew in your ends.
Wave to your friends.

Hi friends!

Cast on again and repeat.  :)